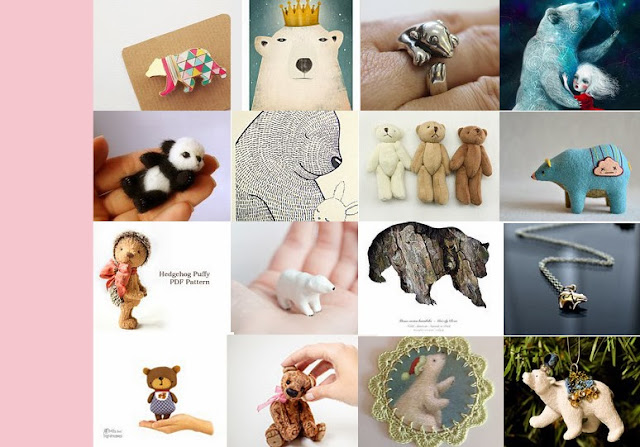
I have always found bears to be so lovable. Fluffy, hug-able, cute, and clumsy, bears have stumbled into our daily lives! Check out the newest addition on etsy!
Have you developed a new symptom of bear fever? Me too! Happy Halloween everyone!
I have wanted to create my own social media icon to match the color theme, but it seems like I needed to put in HTML codes into Blogger. I am not a computer person, so all these backslashes and brackets confuses me.
I researched for about an hour, and sort of gave up, because almost everything I see, is either designs only or HTMLs and HTMLs come with the design. It was so confusing. I tried different keywords to search on google, and somehow stumbled upon this blog by Pam from Design Frantic that teaches you how to DIY social media icon on your own, without html writing skill!!! It looked scary at first but it is not bad at all. Enough sob story. Here's the video first. Instructions below.
Step by step instruction:
Minimum you need: - Social media Icons (you can download premade from Craftiments, or search on pinterest, buy it from etsy, or you can DIY this in windows paint or use software like photoshop and artrage) - blogger account -THATS IT! 1. Draw your own design.
Tip on DIY: these are really cute, but I wanted to design my own so I went ahead and designed it with Photoshop Element 11 and Artrage 3 (drawing program). The size of my icons are 24 x 24 pixel. I tried 48x48 but it was a bit too big. I think 36x36 pixel is a good size also. In the video, the icon size are rectangular shape, I am not sure the exact size. However, it seemed like the round little buttons are in style right now, so I made them round and small (see my icons from top right). Try to make the background of your round icon transparent, it comes out cuter, and more like a button than a square.
2. Watch the video.
Tip: try and do exactly what the video says, it is easy to follow. However, I think now blogger spaces out pictures automatically, in order for your icons to lay nicely side by side, you need just a tiny bit of editing in html after you finish following instructions on the video.
3. HTML edit for spaces between pictures. (This is optional for cosmetics)
In Short, delete the "div"s and "/div"s. If you are not familiar with computer language ever, read on.
To do this, go back to where you got the html in editing the post. and click on html.
What you need to understand about html language is that, everything is in brackets "< >"
So each command does different things. The command that separates pictures are "<div>" and "</div>"
So you need to go into the html, and find all the "div" and "/div"s and delete them. Be careful not to delete "< >" unless it looks like this "</div>" or "<div>".
If it looks like "<div blah blah blah command>" then delete the "div" only, not the "<" in the beginning, and make it look like "<blah blah blah command>"
You always need the brackets to let the computer know where is the starting point and where is the finishing point.
So for example, mine looks like this: Yellow highlight is where source of the picture from, if you are using blogger to build html, it will say something like http://2.bp.blogspot.com/blahblahblah.jpg Highlighted in red is your social media link. Note that I have a "<div blah blah command>" at the beginning, and "</div>" at end of each picture, delete the blue highlighted.
Now, after you delete the blue highlighted above, copy and paste the updated html into your template gadget html (where you were before in the video). Then view blog to enjoy your cute one of a kind social media buttons!
Thanks to the great world wide web, google, Pam from Design Frantic, Craftiments,and YouTube!
If you have any questions, please post comments, and I will be happy to respond!
Please share if you think this post has helped you!
Before I started my own jewelry making, I have discovered Sundance, as the catalog was always shipped to my mom around holiday times. I have bought jewelry from them before, it is very nice jewelry. I have recently picked up the new catalog, and found a couple of inspirations from there.
This was the cover piece, a knotted pearl necklace. I find this piece really good because it has an accent of the red ruby. It is very catchy with the red ruby from the grey pearls. The ruby is also acting as a stopper/clasp of the whole necklace. I thought this was really clever of the design.
Here's a closer look.
Some more inspirations. It seems like the new trend is using pyrite stones (silver stone) as an accent of other beads. I can see a lot of the pieces have pyrite, either in silver or plated gold. The cut is usually small 3mm faceted rondelles. Click on the pictures to go to the source.
rosaria earrings
blue rose necklace
carnelian loop earrings
bubbling brook necklace
moonfire pearl necklace
soothing stream bracelet
Hope you enjoyed these different ideas! and leave a message!
Having a great weekend with friends from California! Saturday we went for a short run for breast cancer [Susan Komen for the Cure, link here for more information]. Saturday night we went to the haunted house in New Orleans, The Mortuary!!! It was very very scary. My friend and I screamed the whole time. The crew was well done, the whole place was dressed up from top to the bottom, and everyone was very professional, yet very SCARY! Some of them are really close to us, breathing down our necks and giving us chills down our backs. This year, the theme was "Zombies." It was FANTASTIC. I totally recommend anyone to go and try it.
We got out tickets online, and one of our team member is a fire fighter captain, so we got to go to the front of the line no waiting. Anyone else, if you don't want to wait, I think the VIP pass is worth every penny. The line is very long, especially this close to Halloween in the most Voodoo city New Orleans.
Here's the treasury from Joules of Jewels for today. Monday is always grey to me. So I created a grey treasury, BUT, it is also very calming and relaxing, with a hint of vintage because I found MANY many great things on etsy today that is related to vintage grey lace.Click on the picture (or here) to go to the treasury list and shop!
I have stumbled upon this website that has great pictures of earth's beautiful landscapes. And they inspire me to create another treasury for today! Check it out.
Above pictures are from Mother Nature Network (source here). And now, here's my treasury list
Check out these listings in my treasury on etsy by clicking on the pictures! What a lovely bright color of yellow! Hope everyone enjoys hump of the week. I am having a small problem with sore throat, and I wish it would go away soon!
I have purchased beads a couple of times from online and in bead shows. There is this one website I discovered called "firemountain gems" (website here). At first glance, I felt a bit iffy about this website, due to the font and the full page of different choices. After reviewing this website for a while, and reading it on a beading magazine, I decided to take a risk and try it out.
Undoubtedly, firemountain has LOTS of choices, from beads, tools, to findings, and wire. There are navigation bars on the left, with many choices, such as beads, jewelry supplies, stringing materials, wires, and other special items. They also have search bar on the left that will sort out prices for you. If you were looking for beads around $1-5 dollars, you can sort that way and be very easy to make some general choices.
The website pricing is fairly reasonable, and sometimes cheaper than other website. But what comes with this, is a little sacrifice of the quality. I find that sometimes the stones were not as well kept and polished as other websites like limabeads.com.
I have purchased this beading wire from firemountain called zebra wire which I don't recommend. I chose these because it was fairly cheap and I was going to use them to do some practice wrapping before using sterling silver. But once I received it, I find the wire is very slippery and harder to shape. Maybe it was the nature of the coating on top of the copper wire.
I usually make my jewelry from natural semi-precious stones. I find this website is easy to navigate through, and I was especially impressed by the selections. However, the way they cut their briolettes seems different than some of the other popular beading websites. For example, in my previous post, I used Carnelian stone from this website (mentioned here). I find that I prefer more of a oval shape briolette than a cylinder shape. See below I made two similar chandelier earrings.
To make a summary of the review of this website, I would recommend to someone who is just starting jewelry making, mainly for the bargain price and wide selection of beads and colors, they also have base metal wire and findings that makes the price a little cheaper than precious metals like sterling silver and gold. However, I do think that one should try out other websites to find their own preferred website. Firemountain gems seems to have everything basic to start your jewelry making. They calculate the shipping once you add everything to cart and are ready to check out. The shipping charge for me is usually no more than $5.00 which is not bad. I have seen other websites charing $9+ for shipping.