

This pair of chandelier earrings are created with sterling silver wire and Canelian stones (available here). Usually, carnelian stones are bright orange and brown, they are also called Sard in some places. I purchased these from Firemountain Gem website, which I will do a partial review in my later blog. These are about 12mm x 6mm, they are faceted. Of course, firemountain gem has much more variety if you just search the keywords "carnelian."
Here's the essential breakdown of the wire wrap. Unfortunately I did not take any "in progress" pictures. I thought these drawing diagram may be more useful in some cases.
Materials:
2 6in 20 Gauge Sterling silver wire
2 2in 20 Gauge sterling silver wire (or two ear wire)
6 about 9in 26 gauge sterling silver wire
6 top drilled beads (range 10mm x 6mm - 14mm x 7mm)
4 rondelle facted stone (range 2mm-3mm)
Tools:
Round nose plier
Flat nose/chain nose plier
Nylon jaw plier
Mandrill (for 7mm diameter big loops)
***Straighten your wires with the nylon jaw plier- always always always, straighten your wires for the best result.***
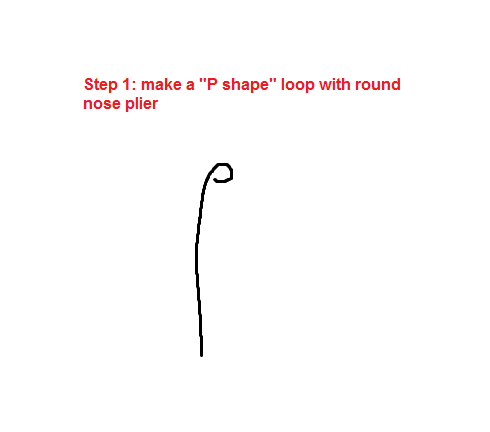
1. make a "p shape" loop from the 6 inch 20 gauge wire with round nose pliers -
2. Use the mandrill to make a big loop on the left (7mm in diameter)

3. Use the mandrill to make another big loop on the right -

Try to make this loop identical to the one on the left. This time it may be harder to hold to the mandrill, but try holding it in your left hand (if you are right handed), and pivot your right hand a bit at a time, adjust positions frequently to have a firm hold on the bending wire at all times.
4. Pivot the wire to the left (see picture below)

5. Make a 2mm loop with your round nose pliers -

6. Make the second loop of the chandelier with your round nose pliers -

7. Make the last loop of the chandelier -

8. Make a ending "p shape" loop with round nose pliers-

This step was not in my original designs, I tried them out in the prototype, and thought this is better than ending abruptly after the 3rd chandelier loop. This step is totally optional, you can also just cut the wire as it ends at the 3rd loop. However, I find if I did that, my chandelier loops were less supported as they will all be hanging by the left wire that we pivoted in step 4. So in my final format, I used this "p shape" to end the design nicely.
9. Attach 3 top drilled tear shape beads with 26 gauge wire wraps
10. Wire wrap 2 rondelle beads into one of the loops for a asymmetrical look - I put the rondelle beads in the right loop to kind of balance out the "p shaped" ending loop (step 8) Just personal preference. You can also fill both loops up with rondelle beads.
11. Make two ear wires with the 2 inch 20 gauge sterling silver wire -
12. Attach the chandelier to the ear wires
Tah dah~
Here's the finishing product! So guys, please post your comments, try out different colors and sizes. And have fun! Check out some variations I did also.

Wire wrapped mint chalcedony earrings above (available here), with a variation of wire wraps. Gold earrings below with glass beads and base metal wire (available here), a little less expensive alternative, but also light on the ears.

This is wonderful! Thanks for sharing!
ReplyDeleteYour tutorial is so easy to follow...great post and lovely items. I love the coral earrings a most! Thank you for sharing!
ReplyDeleteHope you enjoyed it :)
DeleteNice tutorial!
ReplyDelete